How to bring on-premise SQL Server data into Azure Fabric Lakehouse
On-premise data gateway - one of the important feature/service Azure Fabric platform is using to bring your on-premise data into Azure cloud. The data movement is secure and encrypted.
You can review my my earlier post https://splaha.blogspot.com/2025/03/use-on-premise-gateway-in-fabric-and.html where I explain how to configure On-premise data gateway using Step 1 and Step 2.
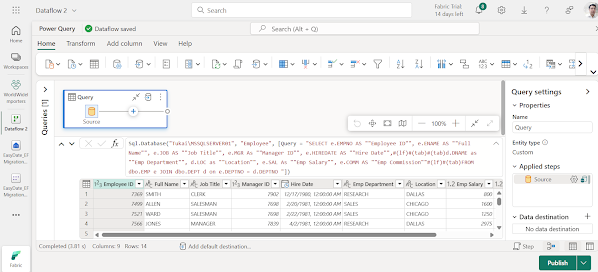
In this exaple, I'm going to use the same data conenction to pull my on-premise SQL tables using custom join SQL into Lakehouse.
The entire post is self explanatory with step-by-step snapshot. I hope this will help you to understand each and individual steps as well as to execute the same at your end.
Let's start with my on-premise SQL server details. As you can see the below picture, it talks about the database Employee where there are two tables EMP and DEPT. I'm going to use the same SQL into Fabric to pull the data.
I assume you already created the on-premise data gateway using my earlier post. In case not, then open Fabric >> Settings >> Manage connection and gateways. If you already have the on-premise data gateway, then go to the next step - Creationn of Dataflow.
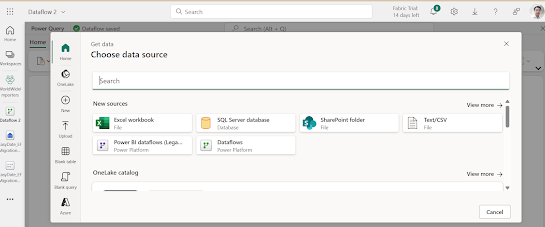
Select More/SQL Server
You can see how fabric use functions to pull your data. You can apply filter, sorting aginst the pull data.
Click on Data destination + icon to select your Destination (where this data is going to save).
In the following example, I choose Lakehouse as I want to store the table in Lakehouse.
Now, if you go to your Lakehouse and click on the newly created table, you can see the data pull from your on-premise store.
I hope you like this post. Comments, request, advice are always welcome :)


Comments
Post a Comment