So far, what we have learned in Data Engineering area specific to Microsoft Azure Cloud - Starting with Azure Data Factory, and then Data Flow, Data Bricks, SCALA, Python, Azure Synapse, and finally we are landing to prepare visualization report using Micrsoft Power BI.
Azure provides inteligency applicable areas for handling data and prdiction - We use Micrsoft Machine Learning workspace and its services. Matured platform providing services and easily plug-and-play model.
Micrsoft now presents Fabric - the BIG jump in this era - At enterprise level, this includes everything under one umbrealla - It brings together experiences such as Data Engineering, Data Factory, Data Science, Data Warehouse, Real-Time Analytics, and Power BI onto a shared SaaS foundation.
(Picture from Mocrsoft Fabric site)
To get into Fabric, Micrsoft offering trail version and good to get insight to have a look at it.
Power BI users can skip trail, however for test of the world, here the link to start - Start the Fabric trial.
Following are steps by steps approch on how you can create your Fabric work space and upload data or existing report file.
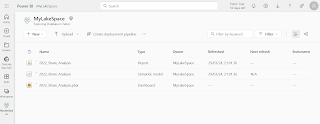
Fabric Home Page
Step 2: Create Your FirstWorkspace
Under Power BI segment, you can actually upload your existing report in 1 click. Upload your existing Power BI report file. Fabric will do the rest for you :)
Nice to found your old reports is in Fabric in seonds. Click on the files and reports to display them in Fabric.
Now, let's try to create a Lake House in Fabric. Click on New and then Option at the end, and in next page select
Step3: Create Lake House
Next, I'm going to upload some excel file here. Here in Git, some example files you can download for this
https://github.com/microsoft/fabric-samples/blob/689e78676174d4627fc3855165bde9100cb4d19e/docs-samples/data-engineering/dimension_customer.csv
Good option here is uploading file can be connected with you M365 SharePoint/Onedrive.
Other option is you can select for Authentication and privacy level. Good for using service account and specific audience.
Step4: Upload the data and click next to review and publish
Review the Data Destination option here. Make sure right option is getting selected.
Finally, click on publish to save the data in Lake.
You now able to save your first data in lakehouse.....Congratulations!


Comments
Post a Comment