Microsoft announced recently their new horse Azure Synapse. This is analytics service integrated with Data Warehousing and Big data analytics features. Formerly, it was known as SQL Data Warehouse, and now, Microsoft integrated with limitless services on it and renamed as Azure Synapse.
Azure Synapse having platform Gen2 which help it to perform much more faster and running on Azure Cloud actually allow this to integrate with unlimited Azure features.
In this post, I'm going to walkthrough very simple way to create the in Cloud environment using Azure UI. However, there are many things need to integrate configure which are not scope of this post. I'll post in future for additional configuration of Azure Synapse.
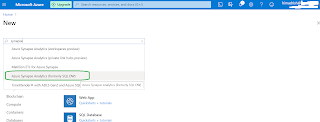
Let's start and create Azure Synapse. To create, go to the Azure portal, login there and click on 'Create a new resource' under Azure Services. Search there writing 'Azure Synapse'. While in the search box, it appears, click on it.
Landed on the Synapse creation page. Very simple way to create the framework. Click on create button to initiate creation process.
In the subscription dropdown, select your subscription. Next select the resource group under which you want to create it. Next is, provide SQL pool name and select the SQL DB server location. Azure Synapse will create SQL DB and associated SQL Pool during creation.
Next to select performance level. Based on the Gen2 and hardware performance framework where Azure Synapse will install and run. There are two option Gen2, and Gen1. Obviously to work with Big data and other rich feature of Azure Synapse you should go with Gen2. One important thing here to note about location, listed all location limited to provide all the features/hardware support for Azure Synapse.
While selecting any performance level, Azure will provide you the cost estimation for the same.
While creating, you can turned on 'Enable Azure Defender for SQL'. This is a unified security package for surfacing and mitigating potential database vulnerabilities, and detecting anomalous activities that could indicate a threat to your database. 'Additional Settings' tab allow to upload your backup data.
Also there is option to load sample data in your Analytics DB.
Finally, 'Review & Create' tab display the configuration information before create the Synapse for you. Click on Create button to start the creation process.
Azure shows the deployment is in progress with correlation-id.
Azure creates one DB as well as one SQL pool for newly Azure Synapse and progress is shown on the creation page.
Once, request completed, Azure shows the information on the page and clicking on the Go to resource button actually land you on Azure Synapse home page.
Clicking on the Overview link on left navigation blade shows details about Azure Synapse like Status, Location, Server Name, Connection String, Maintenance window etc.
As SQL DB is part of Azure Synapse, so for the test purpose or if the SQL DB is not going to use in 24X7 manner, we have an option to Pause the DB. It will help me to save my Azure billing.
Clicking on properties link on left navigation tell us more about Azure Synapse like Rrowstore max size, Columnstore max size, Collation, Server Name, Admin Login etc.
That's it for today and I hope you enjoy the walk through Azure Synapse creation process. I'll post more on how to use Azure Synapse using services. See you soon in my next post on Azure Synapse.
Stay Safe!


Comments
Post a Comment